Quilting 101: Machine Binding

Over the past few months, I’ve had people ask me how I do my binding by machine.  So, the time has come.  It’s time for my first tutorial.  While there are plenty of great tutorials out there for machine binding, I do mine slightly differently.  I’m assuming that you have some knowledge of binding already, but if there are any steps where you are confused feel free to email me or leave a comment!  Apologies for the photos in this tutorial.  I was more concerned with finishing the quilt, but I think they get the point across.  Let me know if you have any follow up questions – or if you use the tutorial successfully! (I hope it’s used successfully…)

First things first.  Prepare your binding.

  1. I always add up all four sides of the quilt, and then add on 20 extra inches.  That’s how long your binding needs to be.
  2. Then, divide this number by 42 inches (safe side) and that’s how many 2.5 inch strips you need to cut.
  3. You almost always need 1/2 a yard of fabric for your binding.  (Unless it’s a baby quilt!)
  4. Sew your binding strips together.  Here is a tutorial for this step– no need to reinvent the wheel!
  5. Start sewing your binding to your quilt raw edge to raw edge on the back.

Here’s where I do things differently.

Yes, I said to sew your binding to the quilt BACK first at a 1/4 inch seam.  I know, I know – bear with me!

When you start, leave about 10 inches of extra binding.  Also, lower your stitches to .3 to lock the stitches in place.

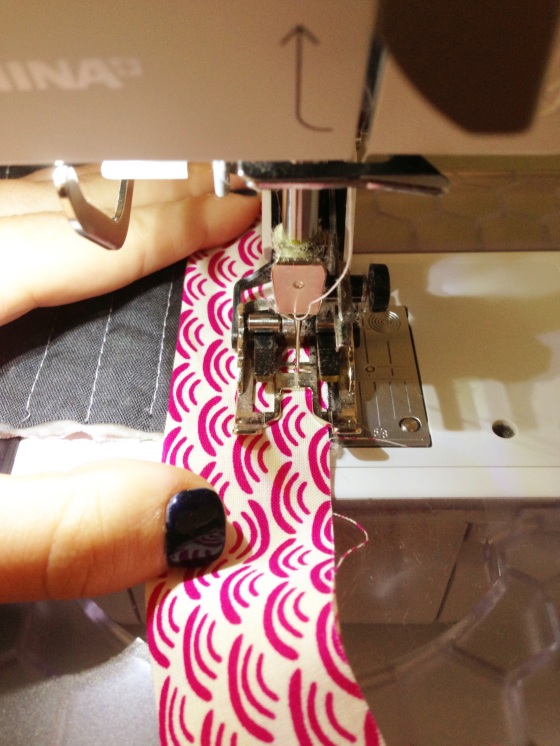
Then, bring the stitch length up and sew until you get to a corner.  This next step is important!

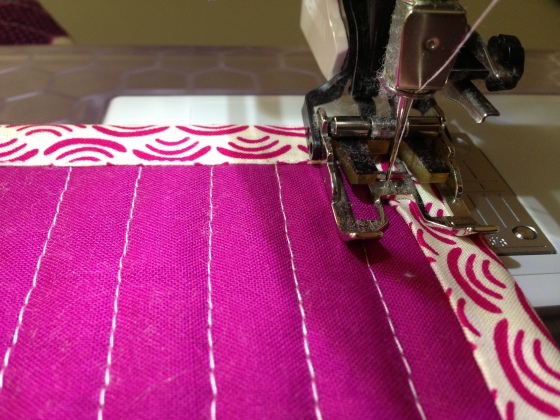
Now, when you get 1/4 of an inch from the end, STOP, but don’t cut your thread.

photo 1

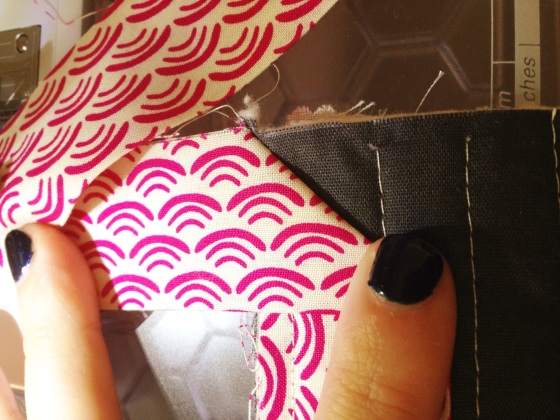
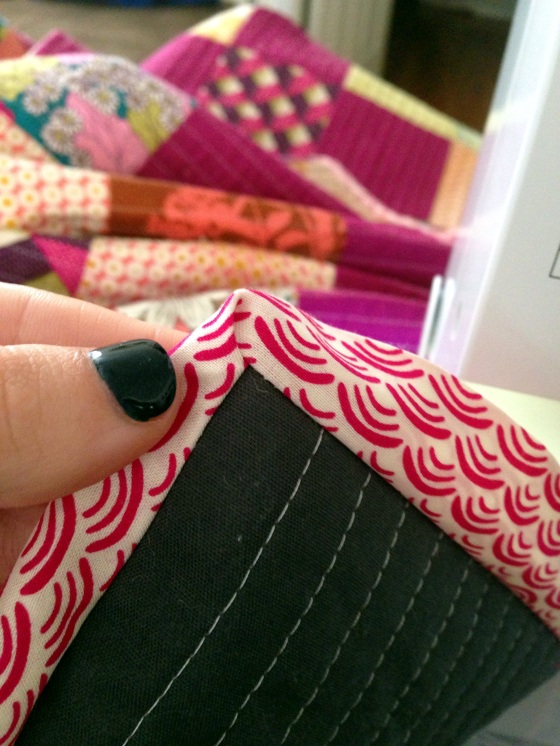
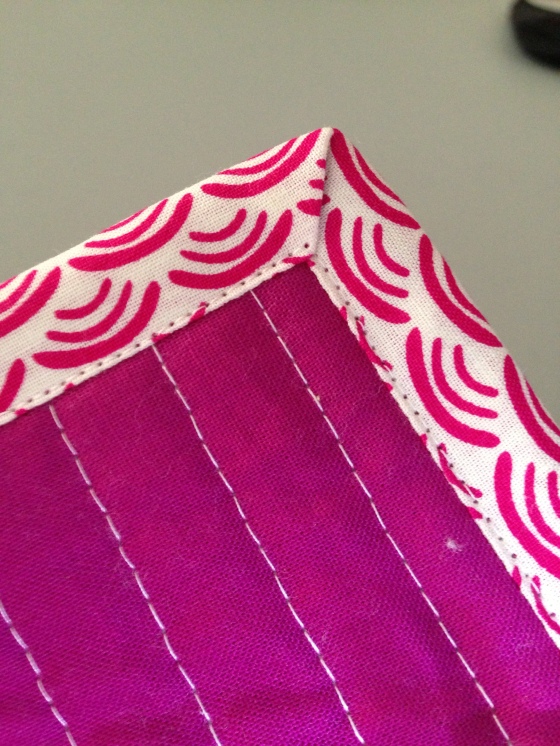
Instead of stopping, turn your quilt at a 45 degree angle and sew off the quilt sandwich.

photo 2

Yes, I need to clean my machine.  But, more importantly, do you see that angle?  Good, sew it off.

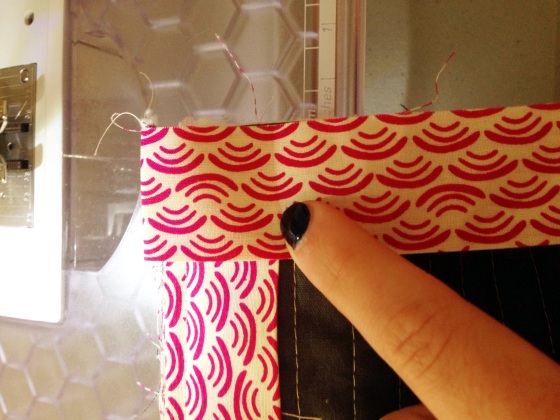
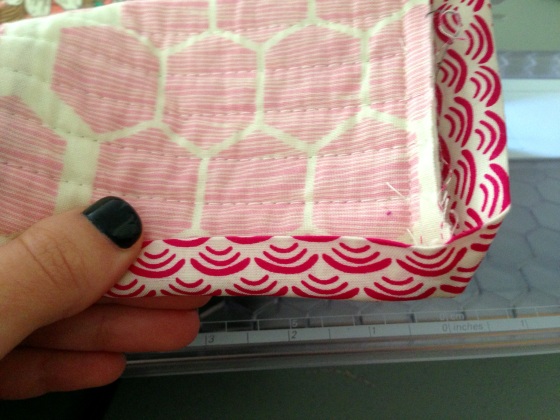
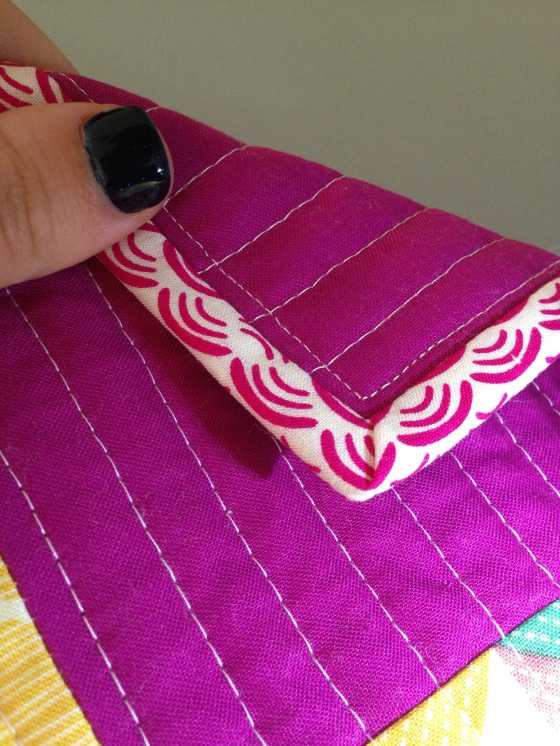
Now, turn your binding up like this:

photo 3

See, those stitches we just made gave you the perfect guide for that 45 degree angle.

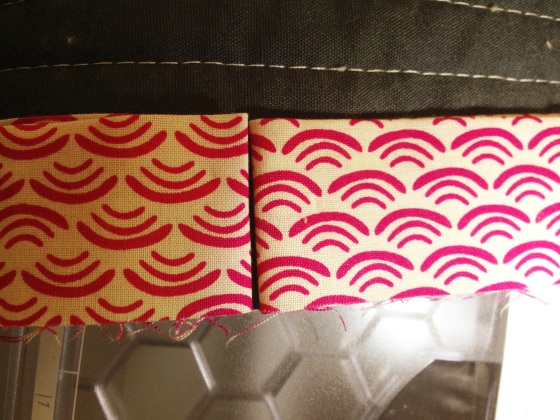
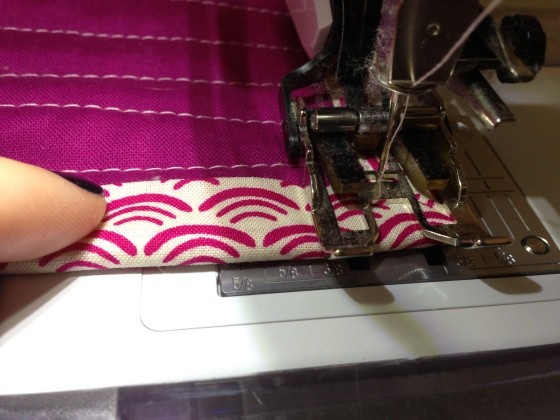
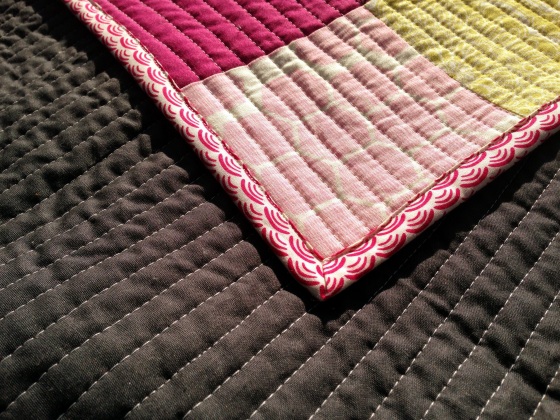
Now, fold it back down so you can get back to sewing.

photo 4

When you start sewing again, sew directly from the edge at a 1/4 inch seam.

Sew all the way around your quilt, stopping 1/4 of an inch away from EACH corner and sewing off at an angle.  This will miter your corners for you.  Then, when you get about 10 inches away from where you started, back stitch, cut your thread and remove from the machine.  Remember that “tail” we left at the beginning?  It’s time to join the ends of your binding.  There are plenty of ways to do this, and again, you can follow any tutorial because they’re all the same.  I just do mine to the back.  However, this is how I do it.  I place the two ends together and pick where I want to match them up.  Then I finger press them in place.

photo 1 (2)

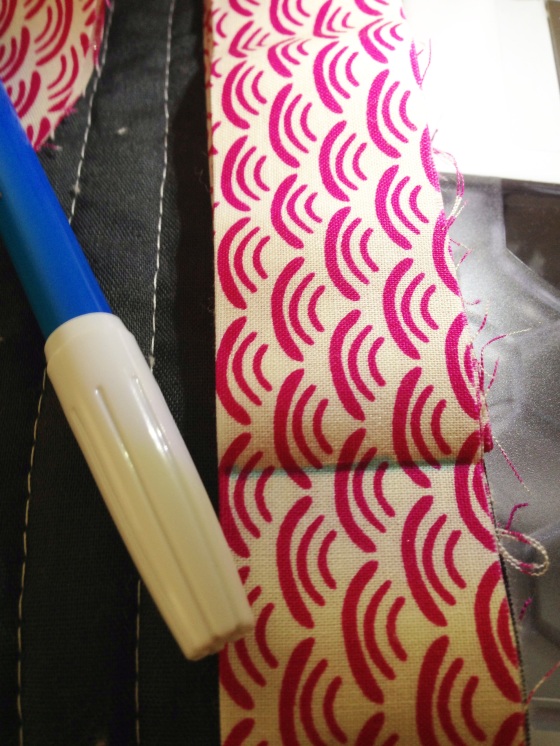
After I finger press, I mark with a pen/pencil/sharpie or I press with an iron so that I can see my mark.

photo 2 (2)

Sew the ends together using the lines you just marked.  Also, I like to sew mine on a smaller stitch but that’s up to you!

Cut off the ends at a 1/4 inch from the stitch line and sew this completely to the quilt sandwich.

Now you are ready to stitch to the front!

Turn your quilt over, and bring the binding over.

Start sewing your binding to the front close to a corner.

TIP: Whenever you start sewing, use a small stitch length to lock it a few times, and then bring it back to your normal length

photo 3 (2)

See how close I started near a corner?

This is important.  Once I’ve gotten the stitches started, I form the mitered corner, and I hold it in place while my walking foot does all the work.

To form your mitered corner, follow these steps:

Look at the back.  The side that’s on top (below it’s the left) gets folded over first.  THEN, fold the other side (the RIGHT) on top of it to make a corner.

photo 5 (2)

photo 4 (2)

See, I folded the left side over.  Now I can fold that right side over into a perfect corner.

Whenever you are about 4 inches from a corner, stop and prepare the mitered corner.  Don’t wait until you get too close or it won’t form properly.  This is the secret.  Prepare the corner when you are 3-4 inches away and hold it in place while you sew, and each one will be perfect.

Sew all the way around with your needle barely on the edge of your binding.

photo 1 (4)

See how close my needle is, and that my corner is already mitered.

And, you might have noticed this, BUT I don’t use any clips.  NONE.

When you come to the mitered corner, do NOT stop sewing.  Turn right at the edge, and start sewing down the next side on the edge of that binding.

See, I know I’m at the corner.  I stop and turn the quilt.

photo 2 (4)

Then, I pick right back up.  Just make sure you always leave your needle down.

photo 3 (4)

Your corners will look like this on the front:

photo 4 (4)

No really.  Each one!

And this is how they will look from the back:

photo 5 (3)

Continue all the way around your quilt until you’re back at your starting point.

Then, go take your quilt on a photo shoot and enjoy those perfect corners!

photo 1 (3)

So, that’s how I machine bind my binding.  Without a single clip or pin.  I know, it’s like Christmas morning.  So, how did I do for my first tutorial?  Let me know if you find this helpful – I hope you do!

New Blogger Series

Quilting 101: Washing Your Quilts

When I started this blog, I would occasionally write a Quilting 101 piece when I learned something.  I figured if it was helpful to me, someone else could use the knowledge.  Today’s Quilting 101 segment is brought to you by all of the fabulous advice shared by quilters when I wrote about why I don’t wash my quilts.  Their advice and reasoning for washing your quilts was spot on.  In fact, I have a quilt washing right now.  Don’t worry, you don’t have to go search through their comments – I’ve compiled them right here.  Enjoy!

  • They won’t fall apart in the wash.  (Good to know as this was my fear.)
  • If they do, it’s usually a pretty quick fix – but check all of the threads carefully when you first pull it out.
  • Use two color catchers the first time
  • Throw a color catcher in every time you wash a quilt, not just the first time
  • Washing helps get the starch out (which can attract bugs)
  • When you wash your quilts, the puckers are much less noticeable.  (Thank God)
  • Give the person you are gifting the quilt to washing advice. I’ve made up a card that I plan on mailing with future cards.
  • Also, let them know you’ve washed it so they know it was made especially for them and not gifted used.  I would have ever thought of this one!
  • All quilts going to the hospital need to be pre-washed before they are handed out
  • Prewash the batting too (yes, you can do that tied up in a pillowcase).
  • Lay it out flat to dry, or put it in the dryer

Again, none of these were my own ideas.  However, I am going to follow them from here on out.  Right now I have my fingers crossed because this is happening right now.

Image

So, if I’ve previously gifted you a quilt and it falls apart, please let me know!  I’ll happily fix it and from now on I’ll trouble shoot before I send it your way.  Happy quilting and now happy washing!

Quilting 101: Fat Quarters

Well, hello there.  Welcome back to Quilting 101!  One of the best parts of starting this blogging journey has been the friends that have reached out with their own excitement over quilting.  Each message makes me so excited, and I can’t wait to have quilting parties.  And now back to the point!

When I first starting collecting fabric, I did not understand what fat quarters were at all.  Now, I am obsessed.  I want to buy them all.  I might before it’s all said and done.  Sorry, Hubs.

So, what exactly are these magical gems?  They are quarter yards of fabric.  So, are you just asking for a quarter yard cut at the store?  Oh, no.  The cut is different.  These guys like their brownies, and they are fat.  Here’s an image to help you out from about.com:

ImageOne yard of fabric is 36″x44″.  So, a regular quarter yard is 9″ x 44″.  Which is great if you need long strips, binding, sashing, or a few pieces.  However, a quarter yard is cut from a half yard of fabric so that yes, it’s shorter, but it’s wider – 18″.  This gives you more choices for various larger cuts.  I found this image from Pieceful Living really helpful:

Image

You could never get all those cuts from a regular quarter yard, which means you’d have fabric left over from a larger cut – which, really isn’t a problem…

Here’s another handy chart thanks to Pinterest.  What did I do before Pinterest? 

Image

Now, once you know how many squares you have to cut for your pattern, you can use this handy chart to see if you can use fat quarters for your quilt.  For example, I’m making a baby quilt this weekend, and I need 80 4.5 inch squares total.  Since I can get 16 from a fat quarter, I would only need to buy 5 fat quarters.  I want more variety in fabric, but it’s a handy tool!  I know that I can get enough squares from a fat quarter, so I don’t need to buy a 1/2 yard cut… unless I really want to…

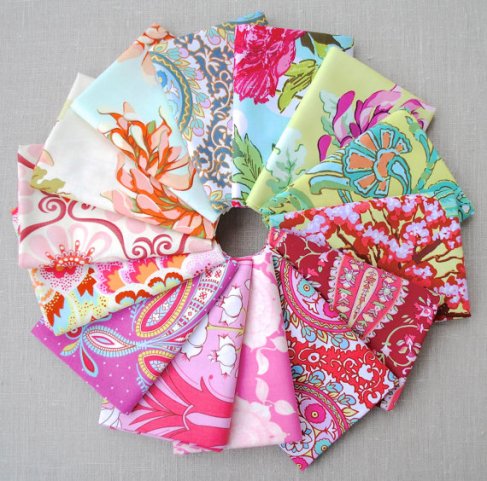
Now, onto why you should buy fat quarters.  Fabric stores know you’re going to buy them so they have them everywhere.  Don’t believe me?  Try to walk into a quilting store and walk out without a fat quarter.  I’ve only done it once.  They are super cheap, and they also package them individually or in bundles.  Tied with a ribbon.  It’s like Christmas.  They have basically already designed the quilt for you.  Either an entire fabric line is packaged as a fat quarter set or they mix and match fabric lines to create a bundle.

Here are a few images from my favorite Etsy shops.  (I’m not linking to the actual item, since it might sell out, but I am linking to the stores because I’ve bought from them and received prompt, quality service!)

  Moona Fabrics

ImageImage

Left ($19.25) Right (27.50)

Southern Fabric

ImageImage

Top (19.99) Bottom (31.99)

My Fabric Store

Narrowing down this shop was impossible. I could spend my entire budget and then some.

Image

$24.40.  Say WHAT?!  I would love this as a baby girl quilt.

Image

$38.50.  For 14 Fat Quarters.  Which is 3.5 yards.  Want.  Like, yesterday!

And, who could forget Fat Quarter Shop?!

So, there you have it.  Fat quarters.  Buy one, buy one hundred.  I don’t care.  As long as you are buying them.  You can also buy them for me.  Whenever.  Valentines, Birthday, Wife Day, Anniversary, Christmas… (Hey Mom and Hubs!)

So, what are you waiting for – go buy some fabric!


Quilting 101: Charm Packs

Welcome back to Quilting 101 – since we’re all novices around here!  Well, at least I am.

Charm packs.

Charm packs are cute 5×5 inch pieces of fabric grouped together as a collection.  (Be careful when you are buying, sometimes they are 6×6 inches.)  They are easy to use (yes, they are already cut!) and affordable (you can get an entire line on the cheap – HEY).  I haven’t used a charm pack yet, but I have quite a few bookmarked on Etsy that I want.

There are so many great uses for charm packs because you can literally open them and just start sewing.  One pack can make a super cute baby quilt.  Before you know it, you’re a quilter with a charm pack!

Here are some great quilts that are either made with charm packs, or could easily be made with charm packs.  Again, I’ve linked to the tutorials where I could.  Onto the charm pack inspiration:

Fun fact: I’m making this baby next!  A friend is preggers and I can’t wait to surprise her with this goodie.  Red Pepper Quilts is basically my quilting hero.  There isn’t a tutorial for this quilt–  I’m just obsessed with her fabric selection, so I basically plan to copy many of her fabric selections.  Hey, don’t reinvent the wheel if you don’t have to!

Here’s a baby quilt and a tutorial for piecing, basting, and binding.  She has great steps and pictures to help you out.  This quilt was made with just a charm pack!

Image

Here’s another charm pack quilt from Fresh Lemon Quilts where ya just sew the rows and you’re a quilter before you know it.  Again, I love charm packs because they’re a great way to have an entire collection of fabric on the cheap!  Check out this site.  There are some amazing quilts there!

Image

Ok, now that you’ve seen what you can EASILY do with a charm pack, let’s spice things up – just a tad.  Once you get a hang for sewing those quarter inch seams, it’s time to break out some Half Square Triangles.  These babies are thebomb.com because you can arrange them to make one million designs.  Don’t believe me?  Google image search, “Half Square Triangle Quilts”.  See, I’m right.

Before we can get to the goodies, here is a great tutorial on making half square triangles where you get 4 out of 2 charm squares or you can do it the traditional way (number 2) in this tutorial.  Now we’re ready!

If you’re looking for an amazing HST quilt, I’m obsessed with Red Pepper’s Quilt because of the statement piece in the center.  No really, click on it!

SEE?

Basically, how easy is that?  Buy some charm packs in white and some charm packs in a color scheme, follow the tutorials above, and BAM, you’re a quilter!  (Ok, it’s harder than that,  but still…)

Here’s a pattern on Etsy that I love – click the picture!

Image

I want to make the next quilt  from Christa Quilts because I love some good solids.  Sigh, I need these as stocking stuffers… for me!  This quilt is stunning and beautiful and she lays out so many options to make it unique.  Plus, her tutorial is AWESOME for beginners!

Image

Finally, this is a little advanced, charm pack- half square triangles – chevron quilt. Say, WHAT?

Image

Don’t let your mind be blown… but once you learn the half-square triangle technique and you buy a few charm packs, you can make all of these designs. The picture is also linked to a quilt along of this quilt!

ImageMIND BLOWN!

So, not to really trip you out, but they also have mini charm packs that are 2.5 x 2.5 inches.

What are you waiting for – go buy some now!

As for me, I’m going to finish my QUILT!  I can’t wait to show you tomorrow.

Happy Quilting…

Now, go buy a charm pack or two…. or three…

Quilting 101: Jelly Rolls

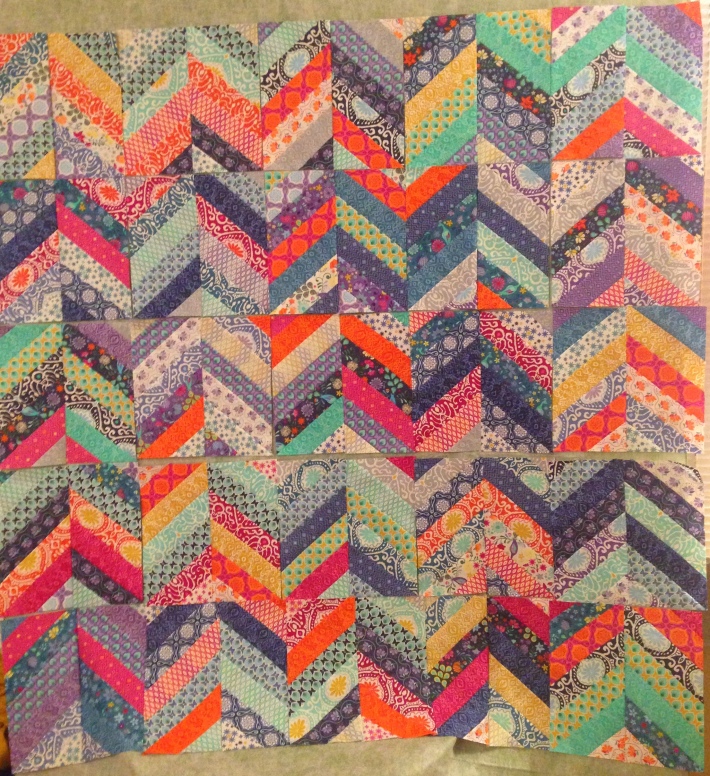
First of all, a little update on the Herringbone Quilt.  It’s coming along quickly, but I’m hoping that I meet Sew Can She‘s deadline tomorrow.

Image

As the Queen of Procrastination I still have quite a lot to do, of course.

Now, onto today’s topic.  Fabric selection.

Many of you have reached out saying that you would like to make a quilt, but you don’t know where to start.  First of all, go you!  Second of all, I felt overwhelmed, too.   This is where I can help.  While I am not an expert, I spend most of my (little) free time these days quilting, researching quilting, reading about quilting, talking about quilting, pinning quilts, etc.  You get the picture.  I want to share what I’ve learned so far in my quilting journey because I know how intimidating it can be to walk into a fabric store and feel overwhelmed.  Now you can just feel overwhelmed by the stunning fabrics surrounding you!

I found that when I started dreaming about the quilts I wanted to make that fabric selection really motivated me.  There’s something about having the fabric in your possession that makes you want to create.  So, now you’re wondering – but what do I buy?  There are all these fancy words I keep throwing around – Jelly Roll, Fat Quarter, Charm Pack, Bundles…  Let’s break down this quilting jargon so you can confidently head to your local quilt store and get started! Each day this week I’ll break down one of these fabric choices and link to some awesome projects you can make with them!

Jelly Rolls

A jelly roll is a great way to get a collection of fabric.  They come with 10-40 strips that are usually 2.5 inches wide by 44 inches long.

Here are some quilts that I love that are made from Jelly Rolls.  This is just to give you an idea of what you can do with the jelly rolls.  Where I could, I’ve linked to the blog or instructions for each quilt.  Just click on the picture:

Image

Rainbow Strip and Flip Quilt Tutorial_thumb

soul blossoms

simplywoven

blooming peaks

So, there you have it.  Jelly Rolls.  Basically, half the work is done for you because they are already cut.  (For the most part, but hey, it can’t be too easy or it wouldn’t be fun!)

Oh, and don’t forget, the Herringbone Block is also made with a jelly roll!

Happy Quilting and keep the questions coming!